

Growing Cannas from seed (03/13/22)
Plus cycad seed germination and rooting Plumeria cuttings

I took some time to make canna cross last summer when the cannas were in full bloom. I currently have four different canna cultivars, each with widely varying heights, leaf patterns, and flower colors. Two cultivars that I grow in particular are very different: the first being a dwarf, almost black-leaved canna with salmon colored flowers (‘Happy Wilma’) and the other a tall, chartreuse-leaved relative giant with orange flowers (‘Pretoria’). Tempted by the possibility of creating a dwarf canna with chartreuse leaves, I made several crosses using pollen from ‘Pretoria’ onto ‘Happy Wilma’ on early August mornings in 2021. After harvesting the seeds in last fall and storing them with my other miscellaneous seeds over the winter, it is now time to begin germinating them to see how their traits segregated in this cross.
Growing cannas from seed may seem like an odd and unnecessary concept, and I am not aware of any nursery propagating them from seed on a commercial scale. But in order to create new cultivars, seed propagation is the only tool available. Making the crosses was not that difficult as the canna anthers (pollen producing structures) and stigma (pollen receiving structure) are large and easy to isolate by hand in the flowers. The only critical requirements I found when making these crosses was to pinch off the anthers (emasculation) from the opening flowers before they began to shed pollen (to avoid self pollination), and to ensure that all crossing was done early in the morning before sunrise. Canna pollen from the anthers quickly dried up as temperatures warmed and humidity dropped. The crossing process after these two considerations was very simple: I just took an anther from one cultivar and brushed it against the stigma of an emasculated flower on another cultivar. Crosses that were successful began to show an expanding seed capsule approximately two weeks after crossing. These seed capsules continued to expand until turning brown in mid to late September of last year, at which point they began to crack open and reveal spherical, black seeds inside.
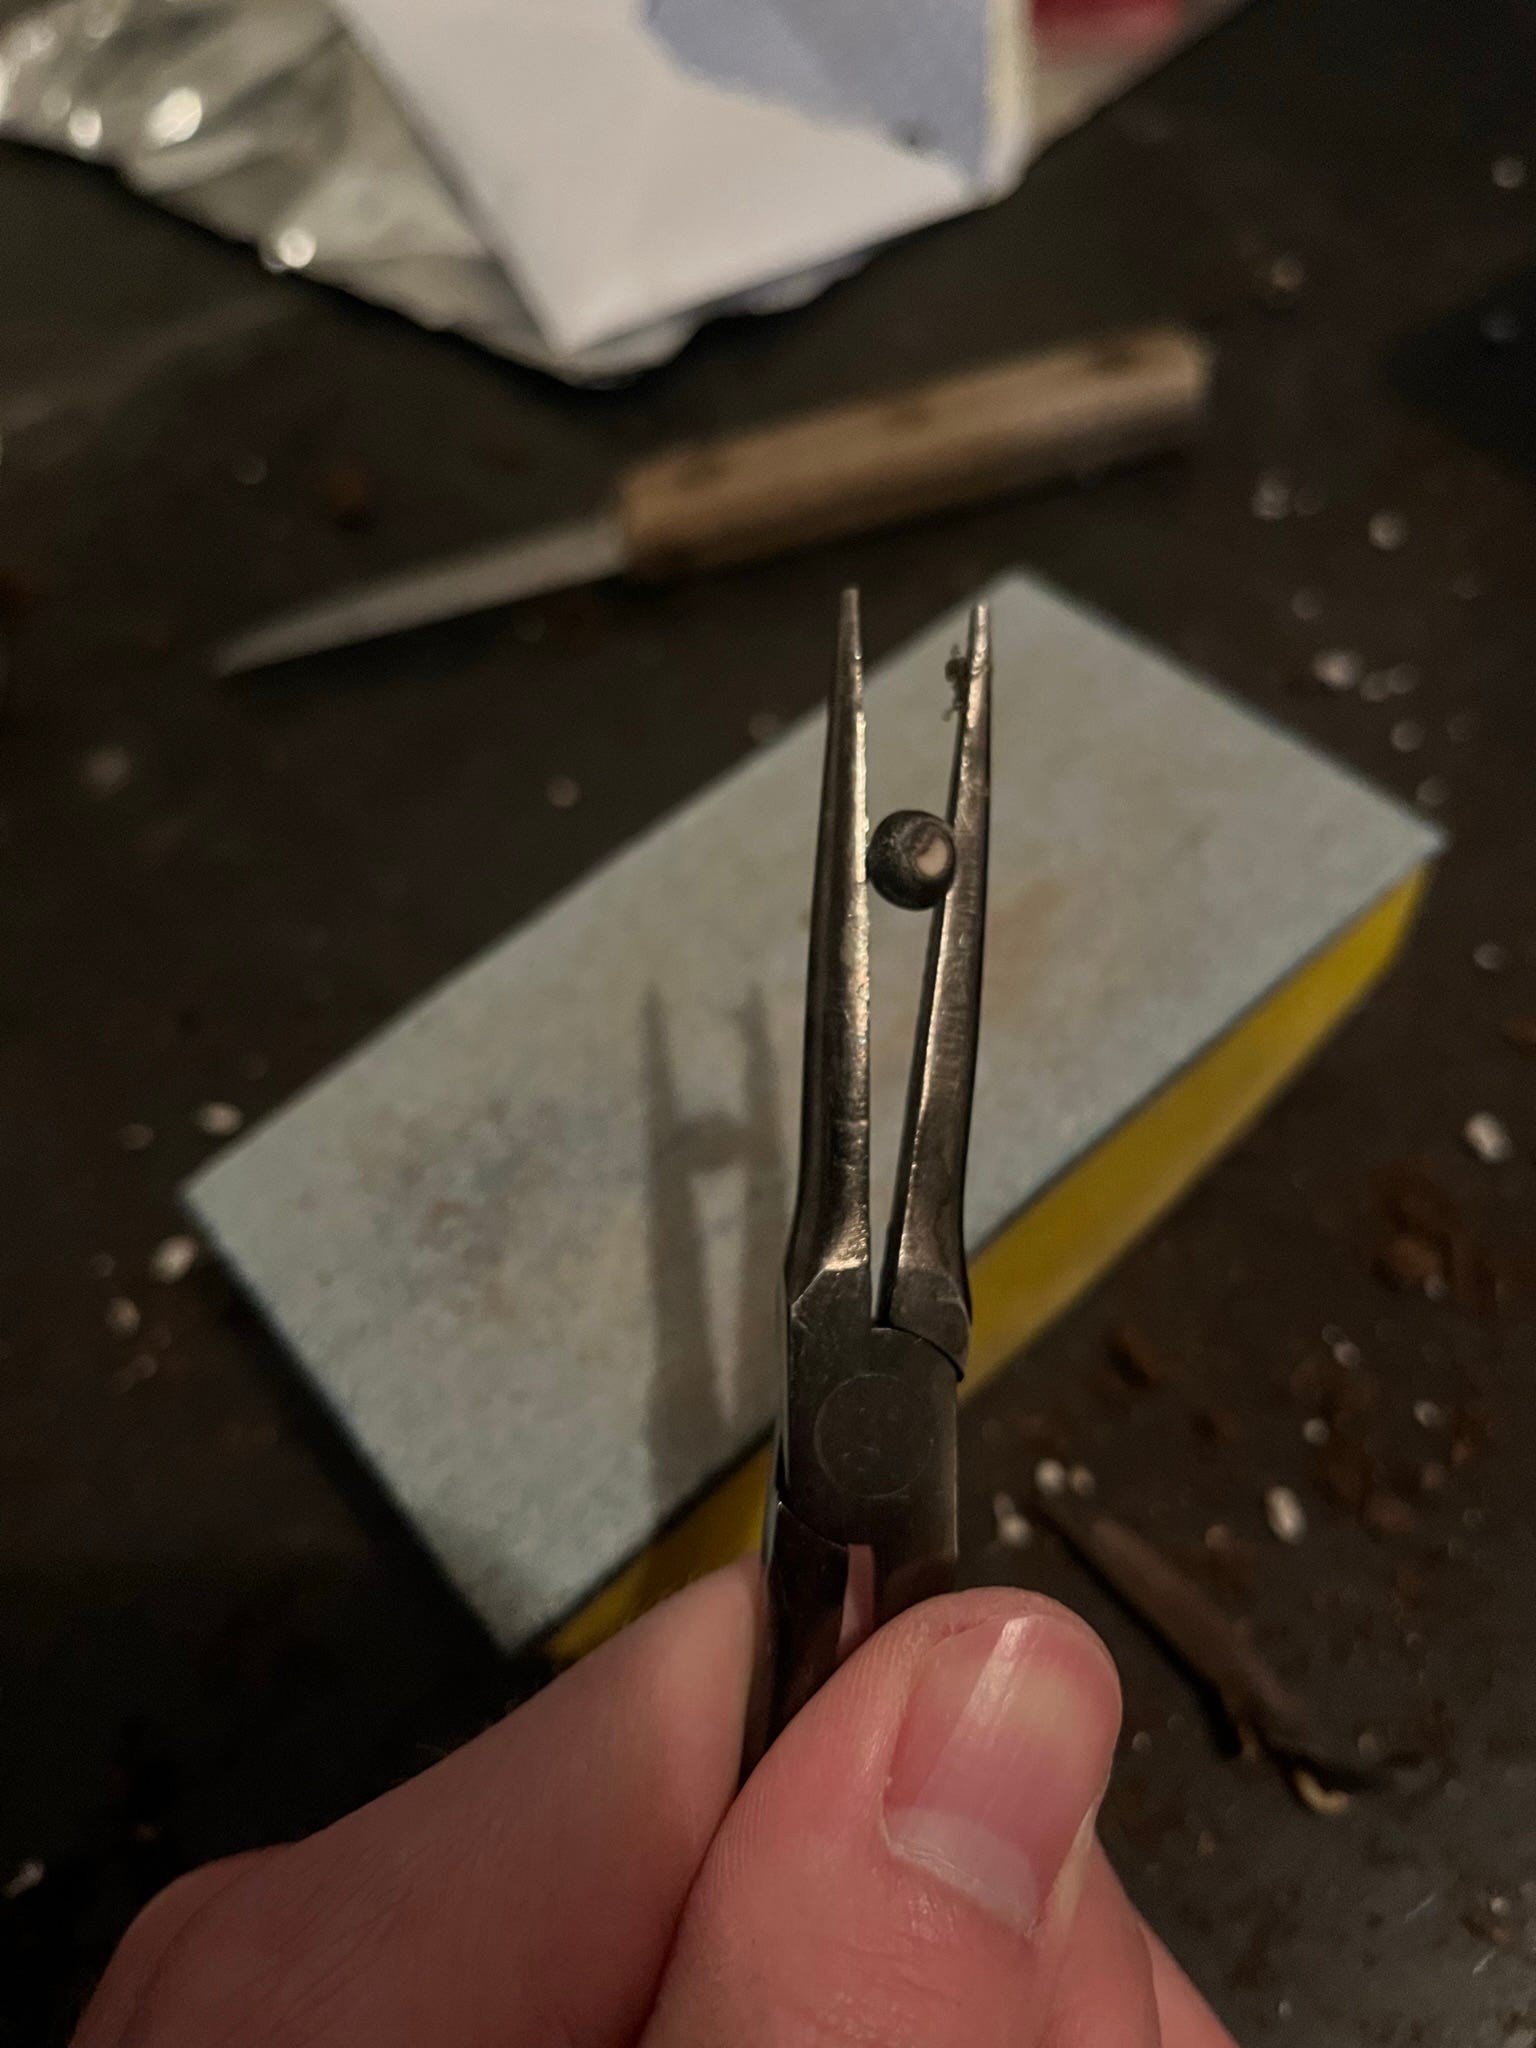
These canna seeds are the same size and shape as a soybean seed, but with a much thicker seedcoat. I using a method that I honed on a few practice seeds last year that was successful in achieving germination. Since thick seedcoats on any seed will slow germination, I scarified (or cut through) part of the seedcoat using sandpaper. I held each seed in the grip of a pliers and rubbed the seedcoat against the sandpaper until I could begin to see the white-ish endosperm of the seed. At this point I stopped: it is important to only puncture the surface of the seedcoat and not inflict unnecessary damage upon the endosperm.
Once the seeds were scarified, I prepared germination media consisting of a 1:1 ratio of peat based potting mix and vermiculite. I placed this germination media in a shallow plastic container, and placed the canna seeds on top. Finally, I covered the canna seeds with approximately a half inch of vermiculite, and watered the container thoroughly. These canna seeds then went under LED grow lights with 85°F bottom heat, and are currently adjacent to the stored canna tubers undergoing the forcing process. I am anticipating to see germination in about 1 week, followed by leaf growth that should reveal any interesting segregation among leaf color traits in this particular cross.
At the same time that I planted these canna seeds, I also planted some cycad seeds that I recently collected on a trip to Florida. The seeds came from a cone (cycads are gymnosperms like cone-bearing pines) of the cycad species Zamia furfuracea, known commonly as Cardboard Palm. I’ve grown cycads from seed once before, and it is a difficult process. Cycad seeds need to be ripe before they have any chance of germinating, and once the seeds are ripe the seeds can still take between one and two months to germinate. Adding to the difficulty is that the cycad seeds often require ripening for several months beyond when the cone begins to disintegrate. Combining the little of this ripening process that I have observed and what I’ve read on the topic, I had reason to suspect that the Zamia seeds I collected were ripe as the red outer coating (sarcotesta) was soft and beginning to wrinkle. Upon returning home, I soaked these seeds in warm water for 5 days to further soften the red sarcotesta so that I could more easily remove it from the seeds, since this coating is known to inhibit germination
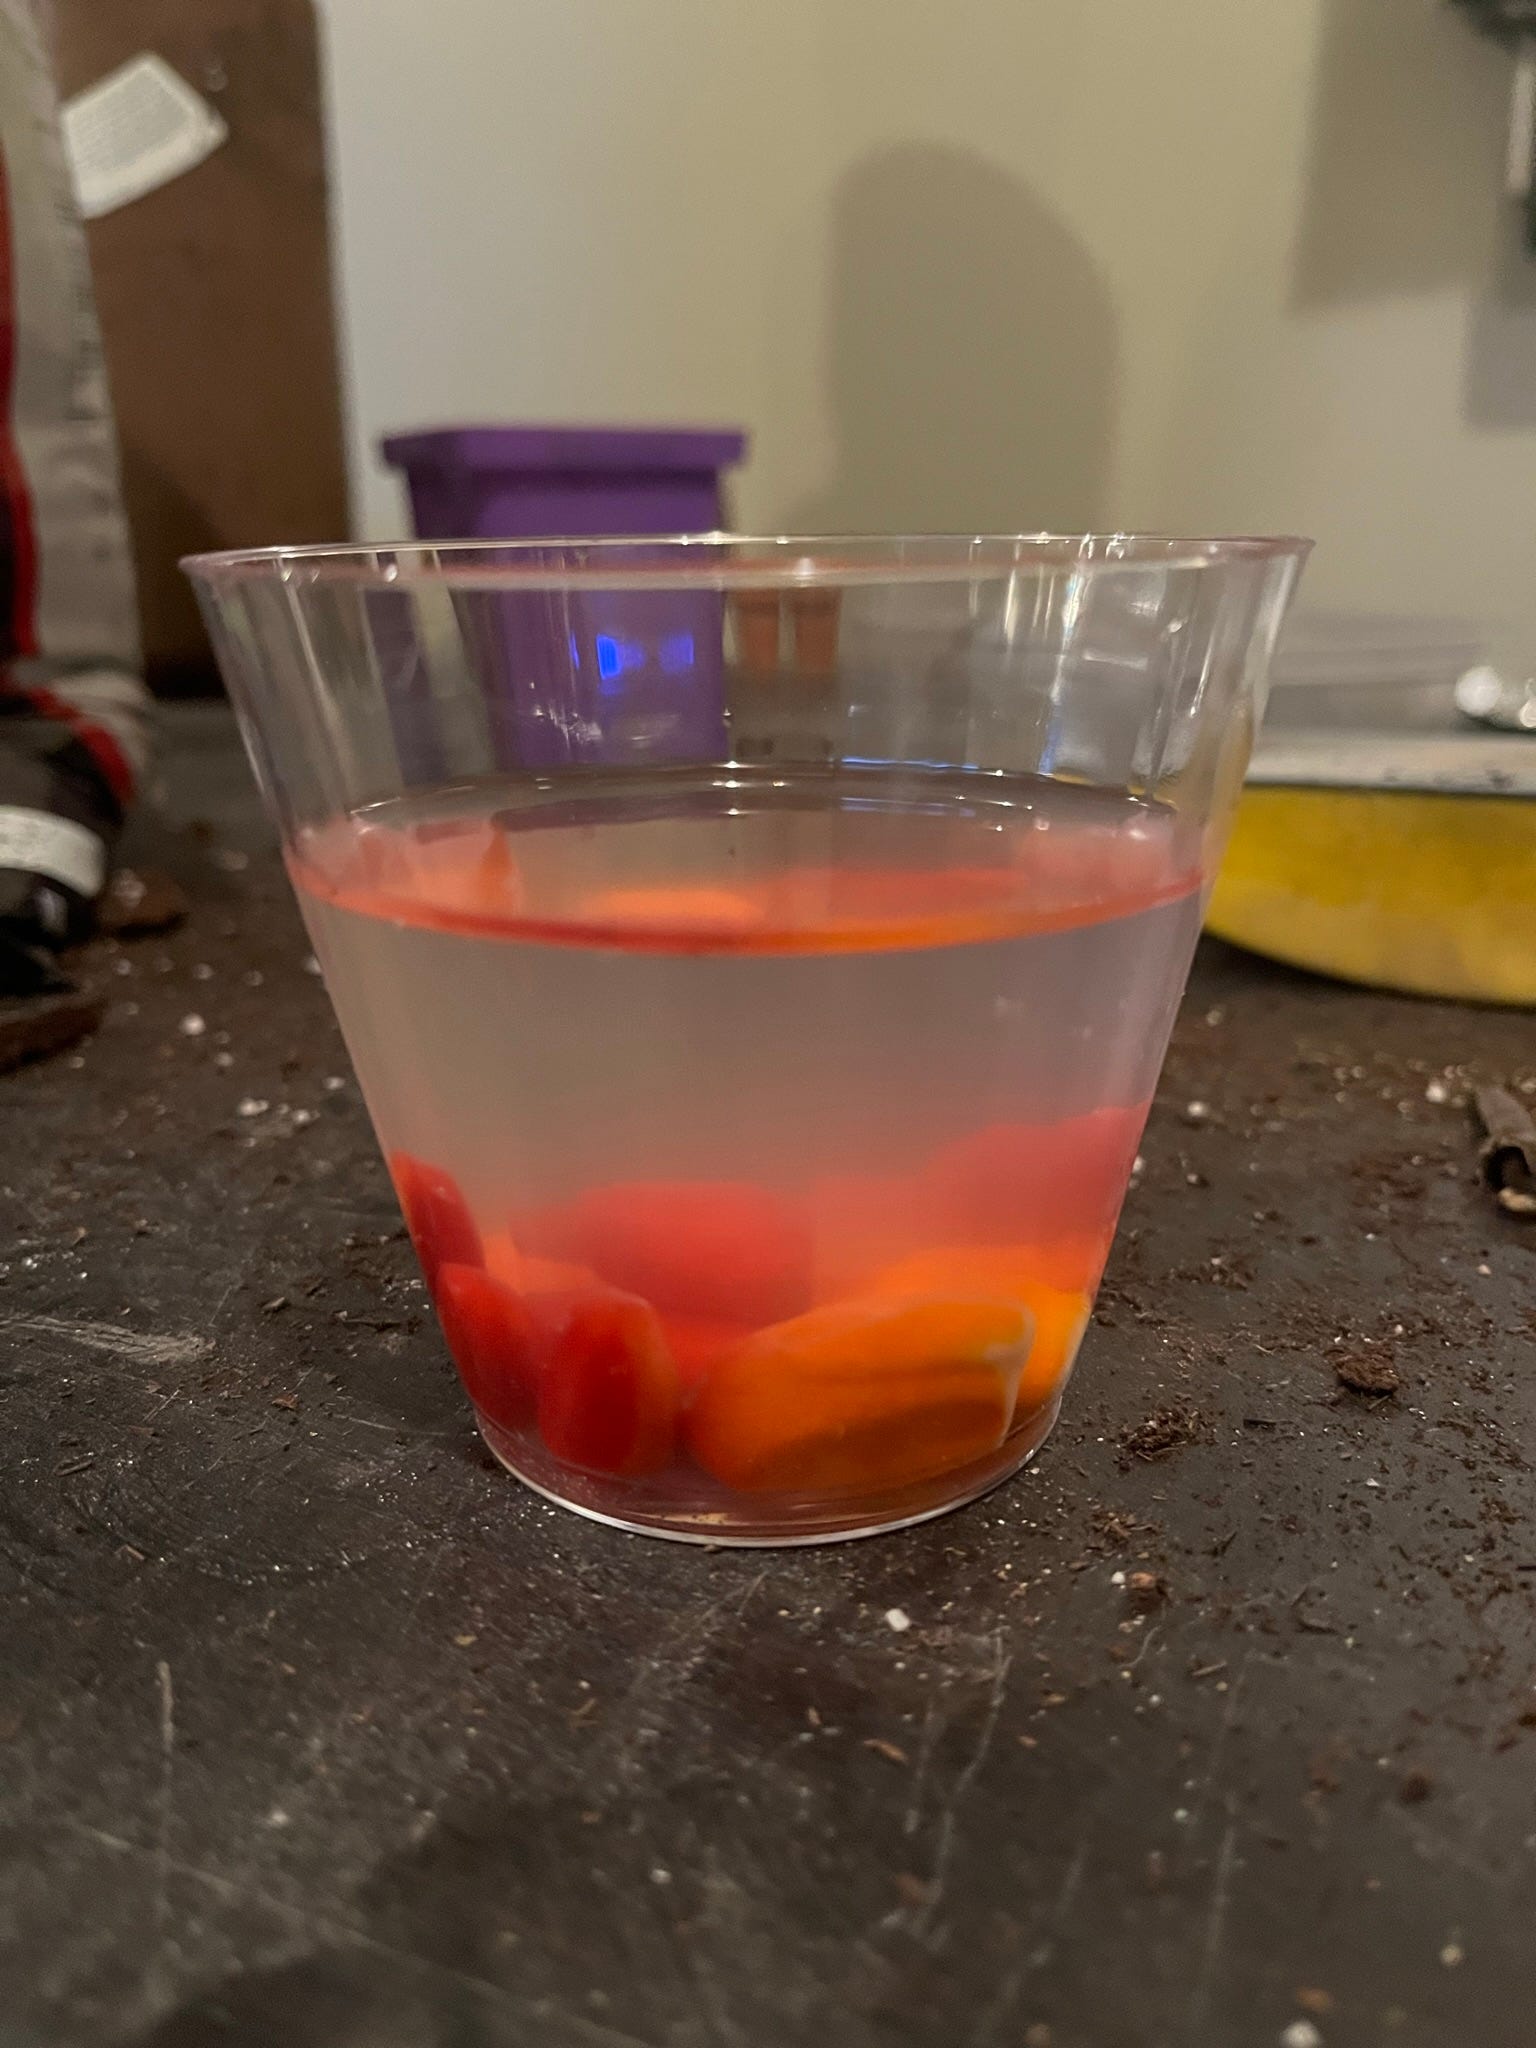
Once these seeds were soaked, I proceeded to remove the sarcotesta. Every cycad seed I’ve encountered smell horrible, much like the worst garbage you can imagine and somewhat similar to gingko seeds; the other odd gymnosperm whose seeds are most structurally similar to cycads. Unlike gingkos however, cycad seeds contain potent neurotoxins that should not be ingested or exposed to skin. So with rubber gloves in hand, I squished off the red sarcotesta on to reveal a pistachio-sized seed within. I then rinsed the seeds several times under running water to remove any trace of the sarcotesta and its various toxins.
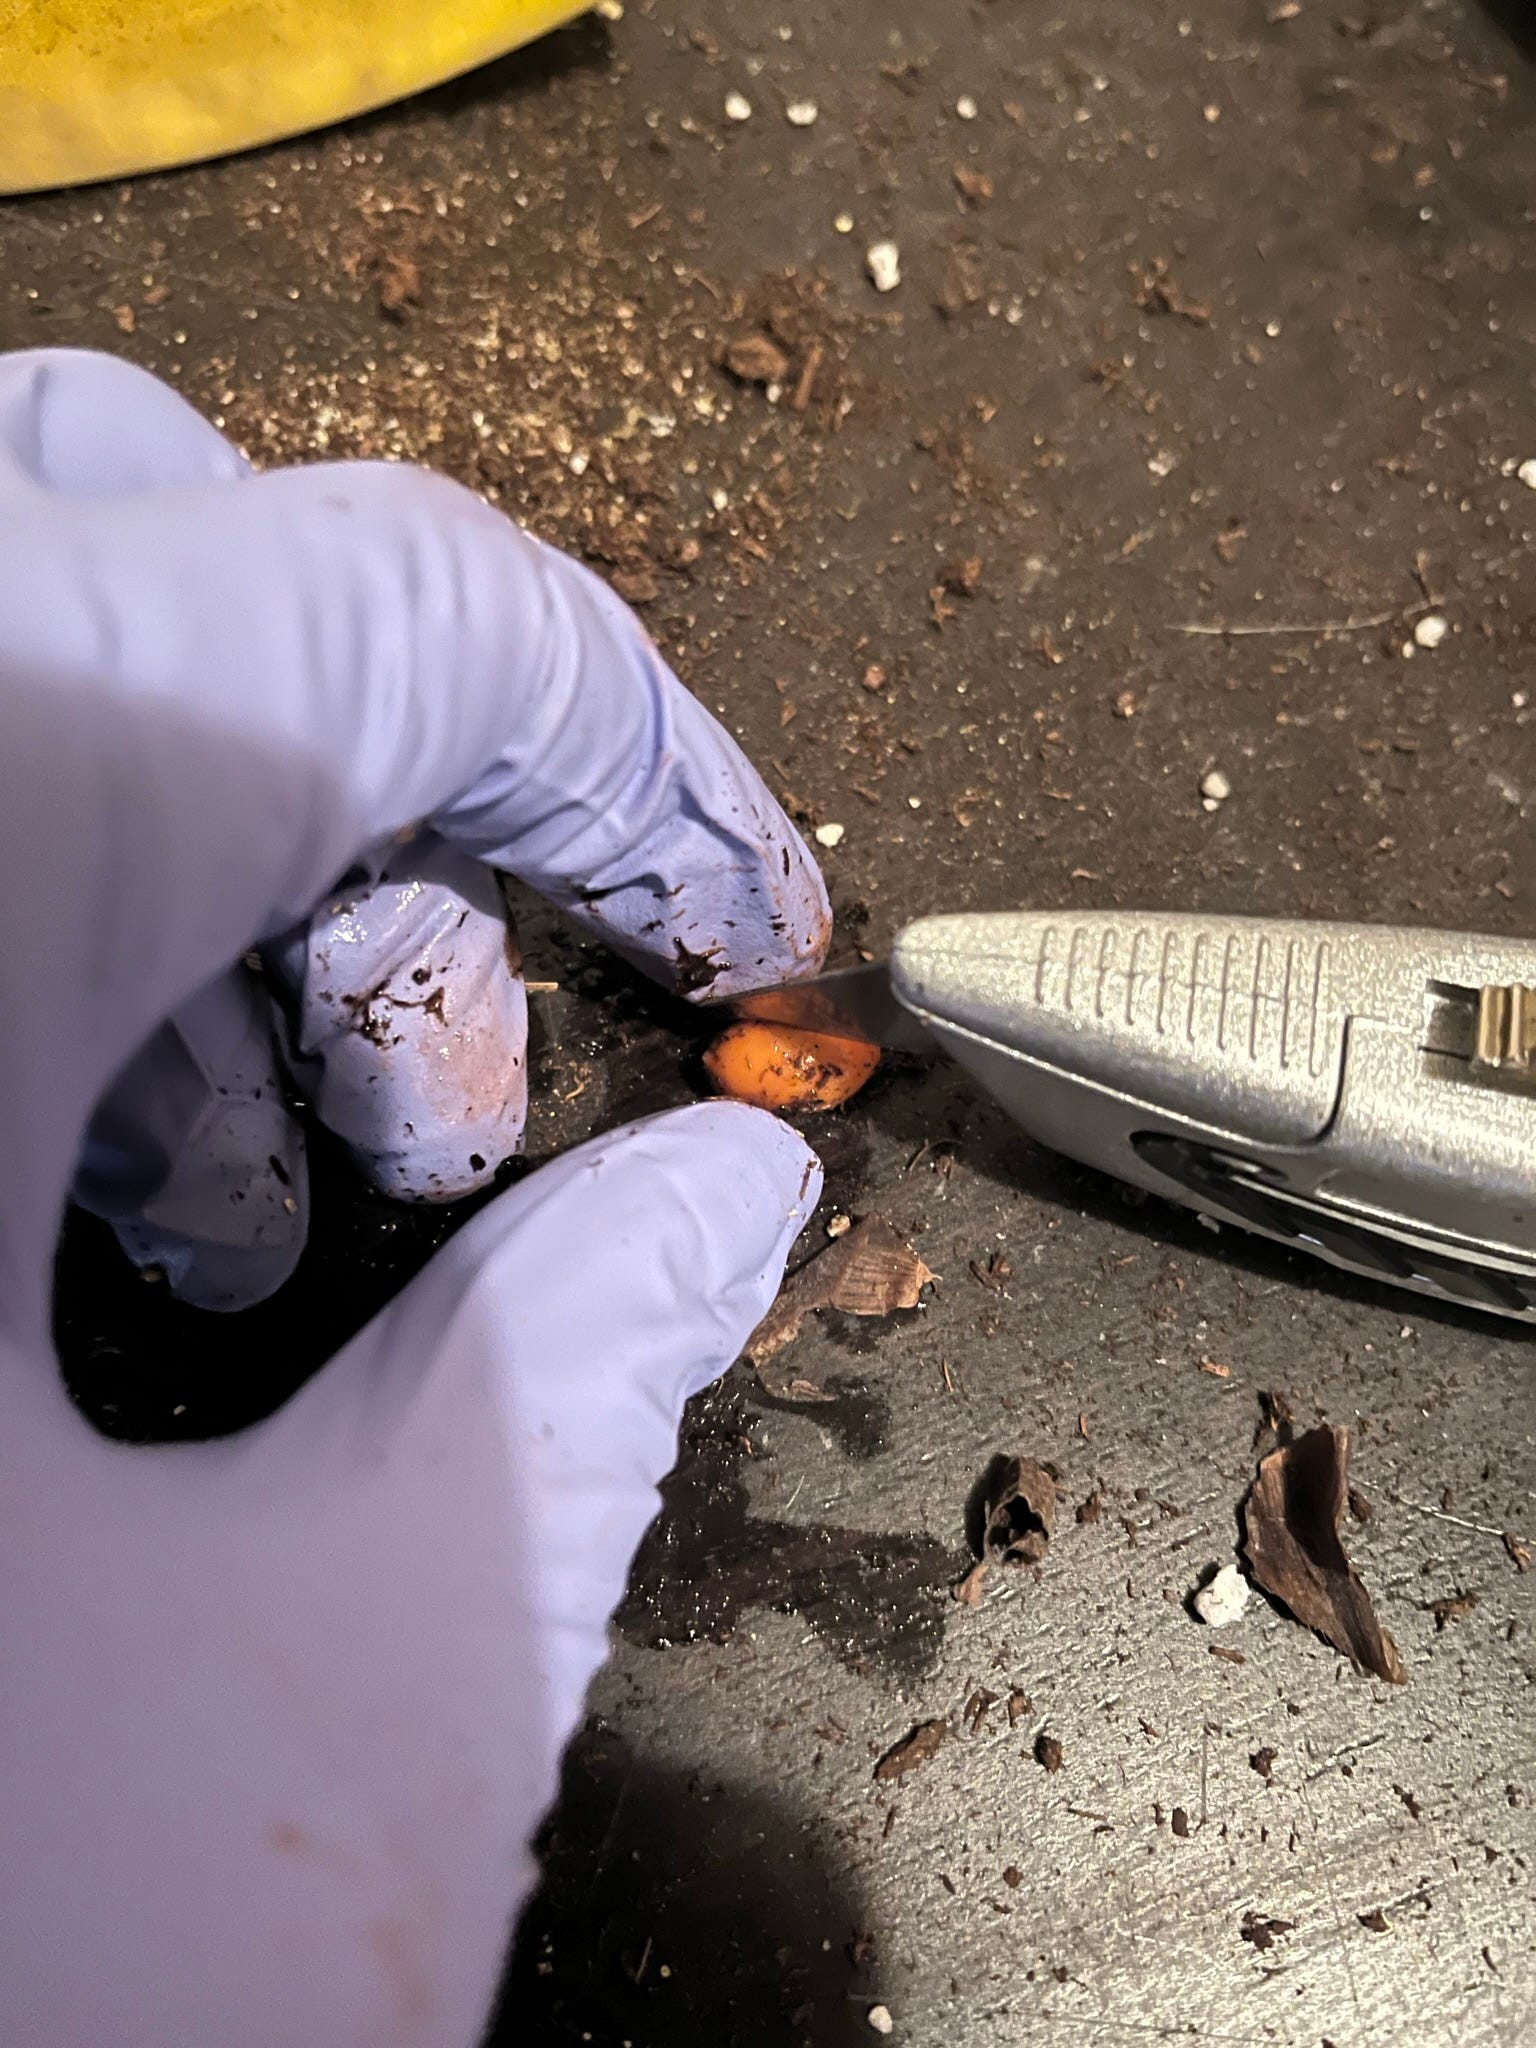
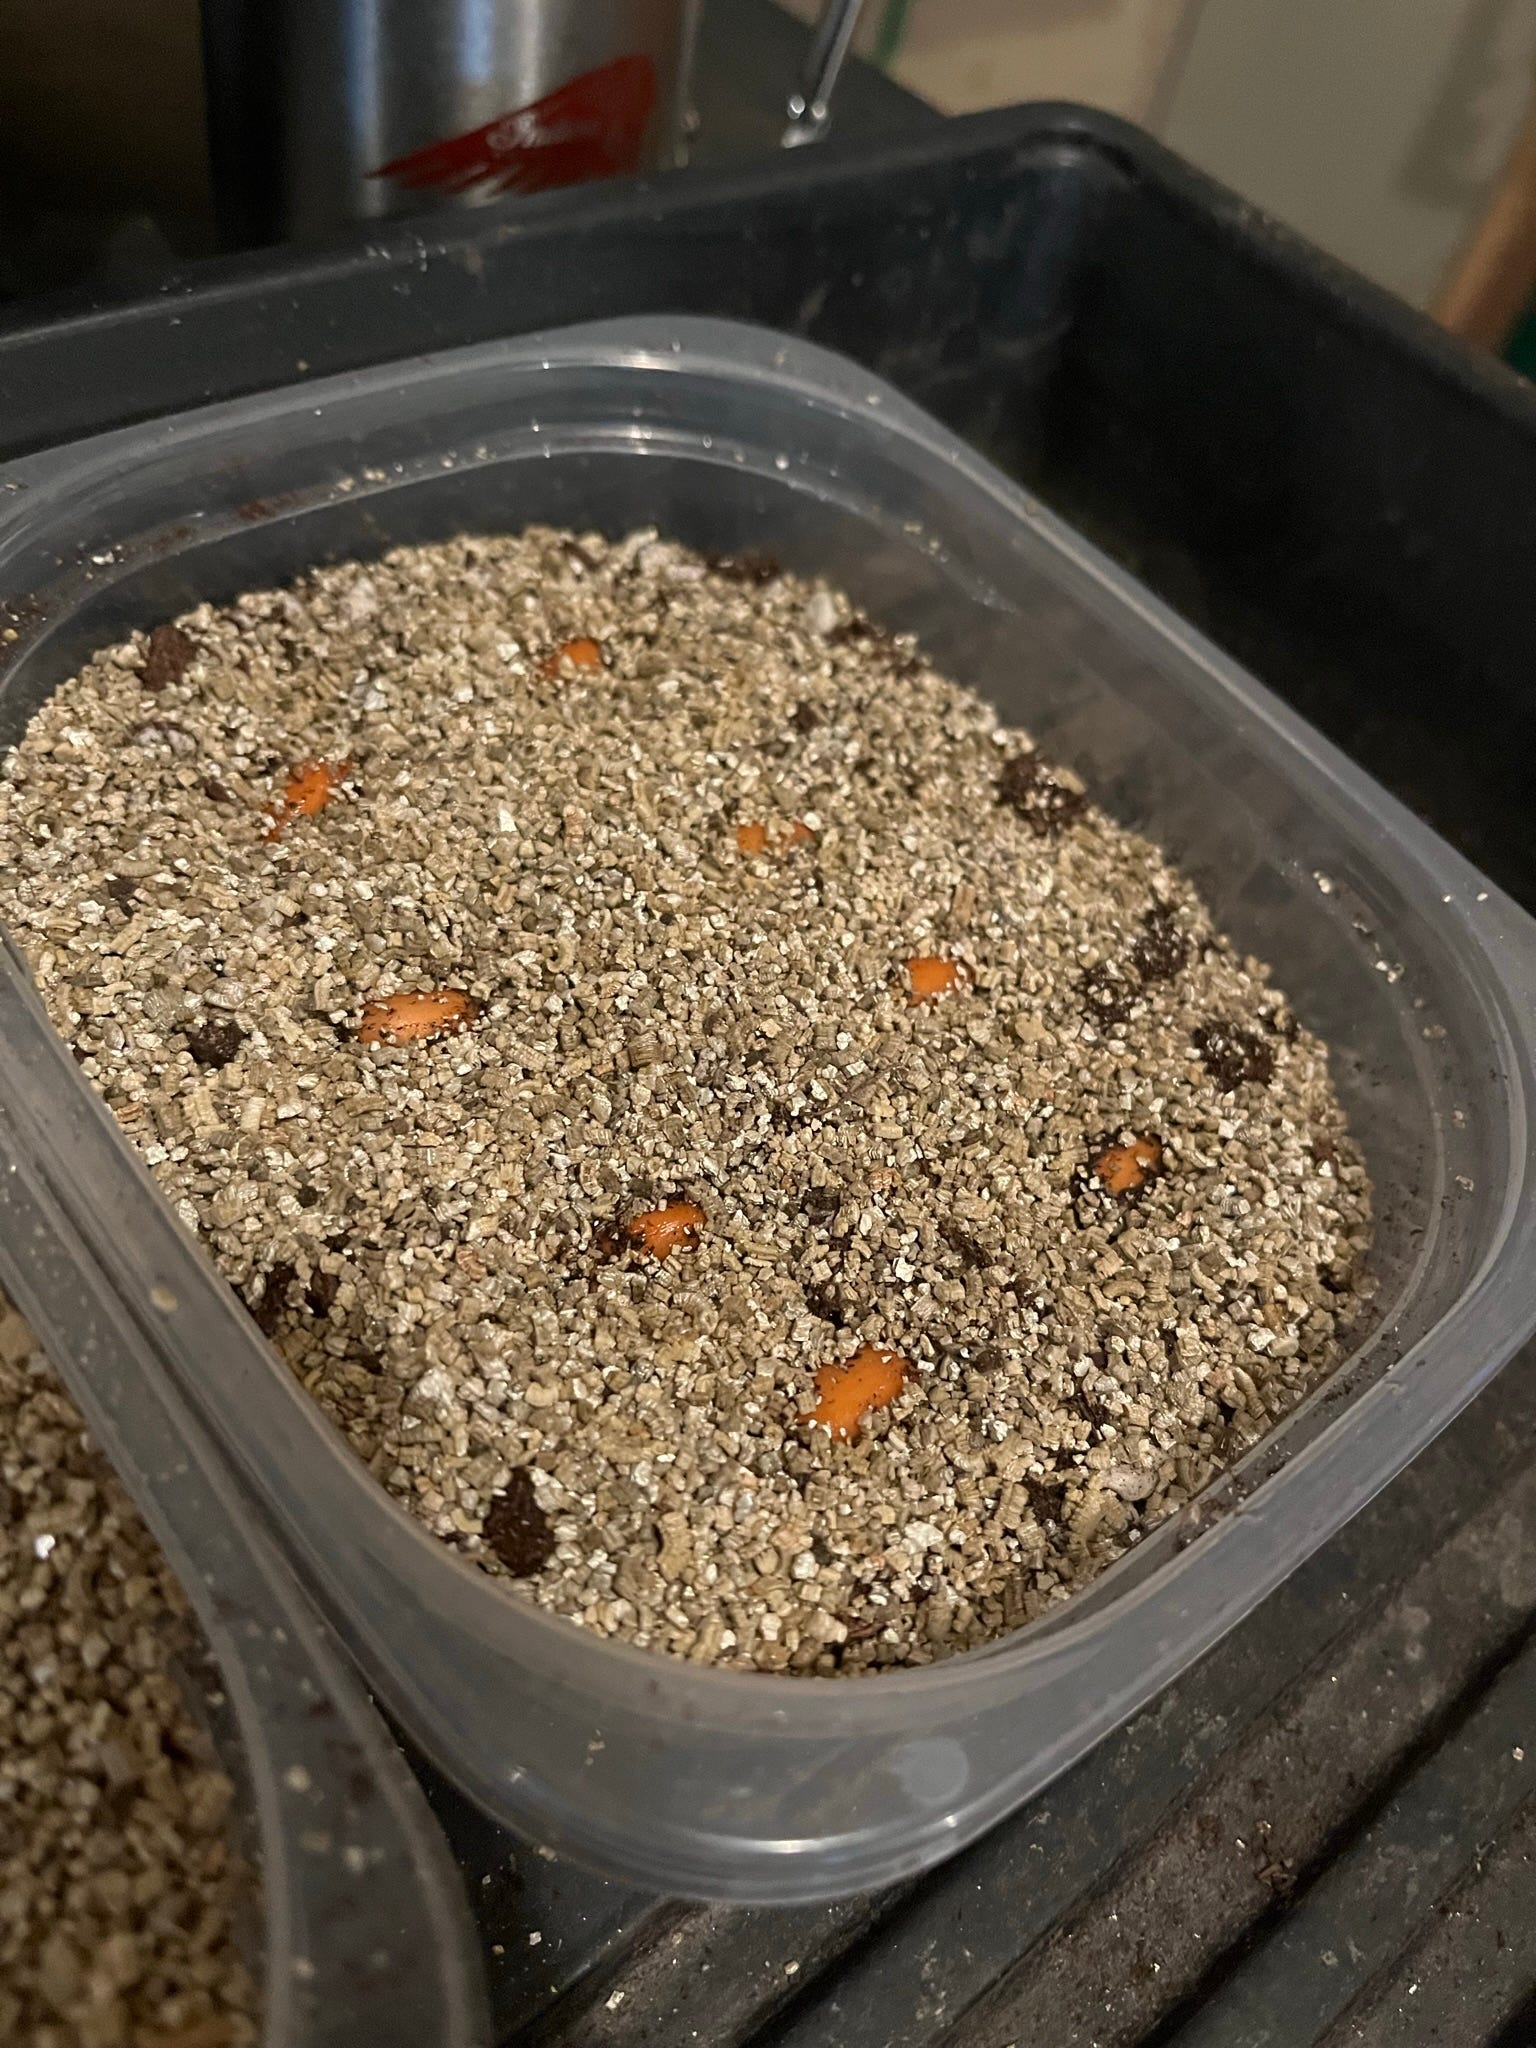
Like canna seeds, cycad seeds have an extremely hard outer seedcoat (known as a sclerotesta). To attempt to expediate an already slow germination process, I scarified these seeds using a utility knife. The sclerotesta is too thick for sanding by hand to be effective, but a few careful slits on each seed are enough to improve moisture access to the underlying embryo. After scarifying I again prepared germination media in a 1:1 ratio of peat based potting mix and vermiculite, and placed this in a shallow plastic container. Cycad seeds need some exposure to air to germinate and cannot be buried under any kind of medium, so the recommended planting method is to lay the seed sideways along the surface and press down until it is 75% submerged in the germination media. I then watered the media thoroughly and placed it right next to the canna seeds and under the same environmental conditions. I’m not expecting any germination activity on these cycad seeds for at least a month, but with any luck these seeds will succeed and grow as the spring progresses.
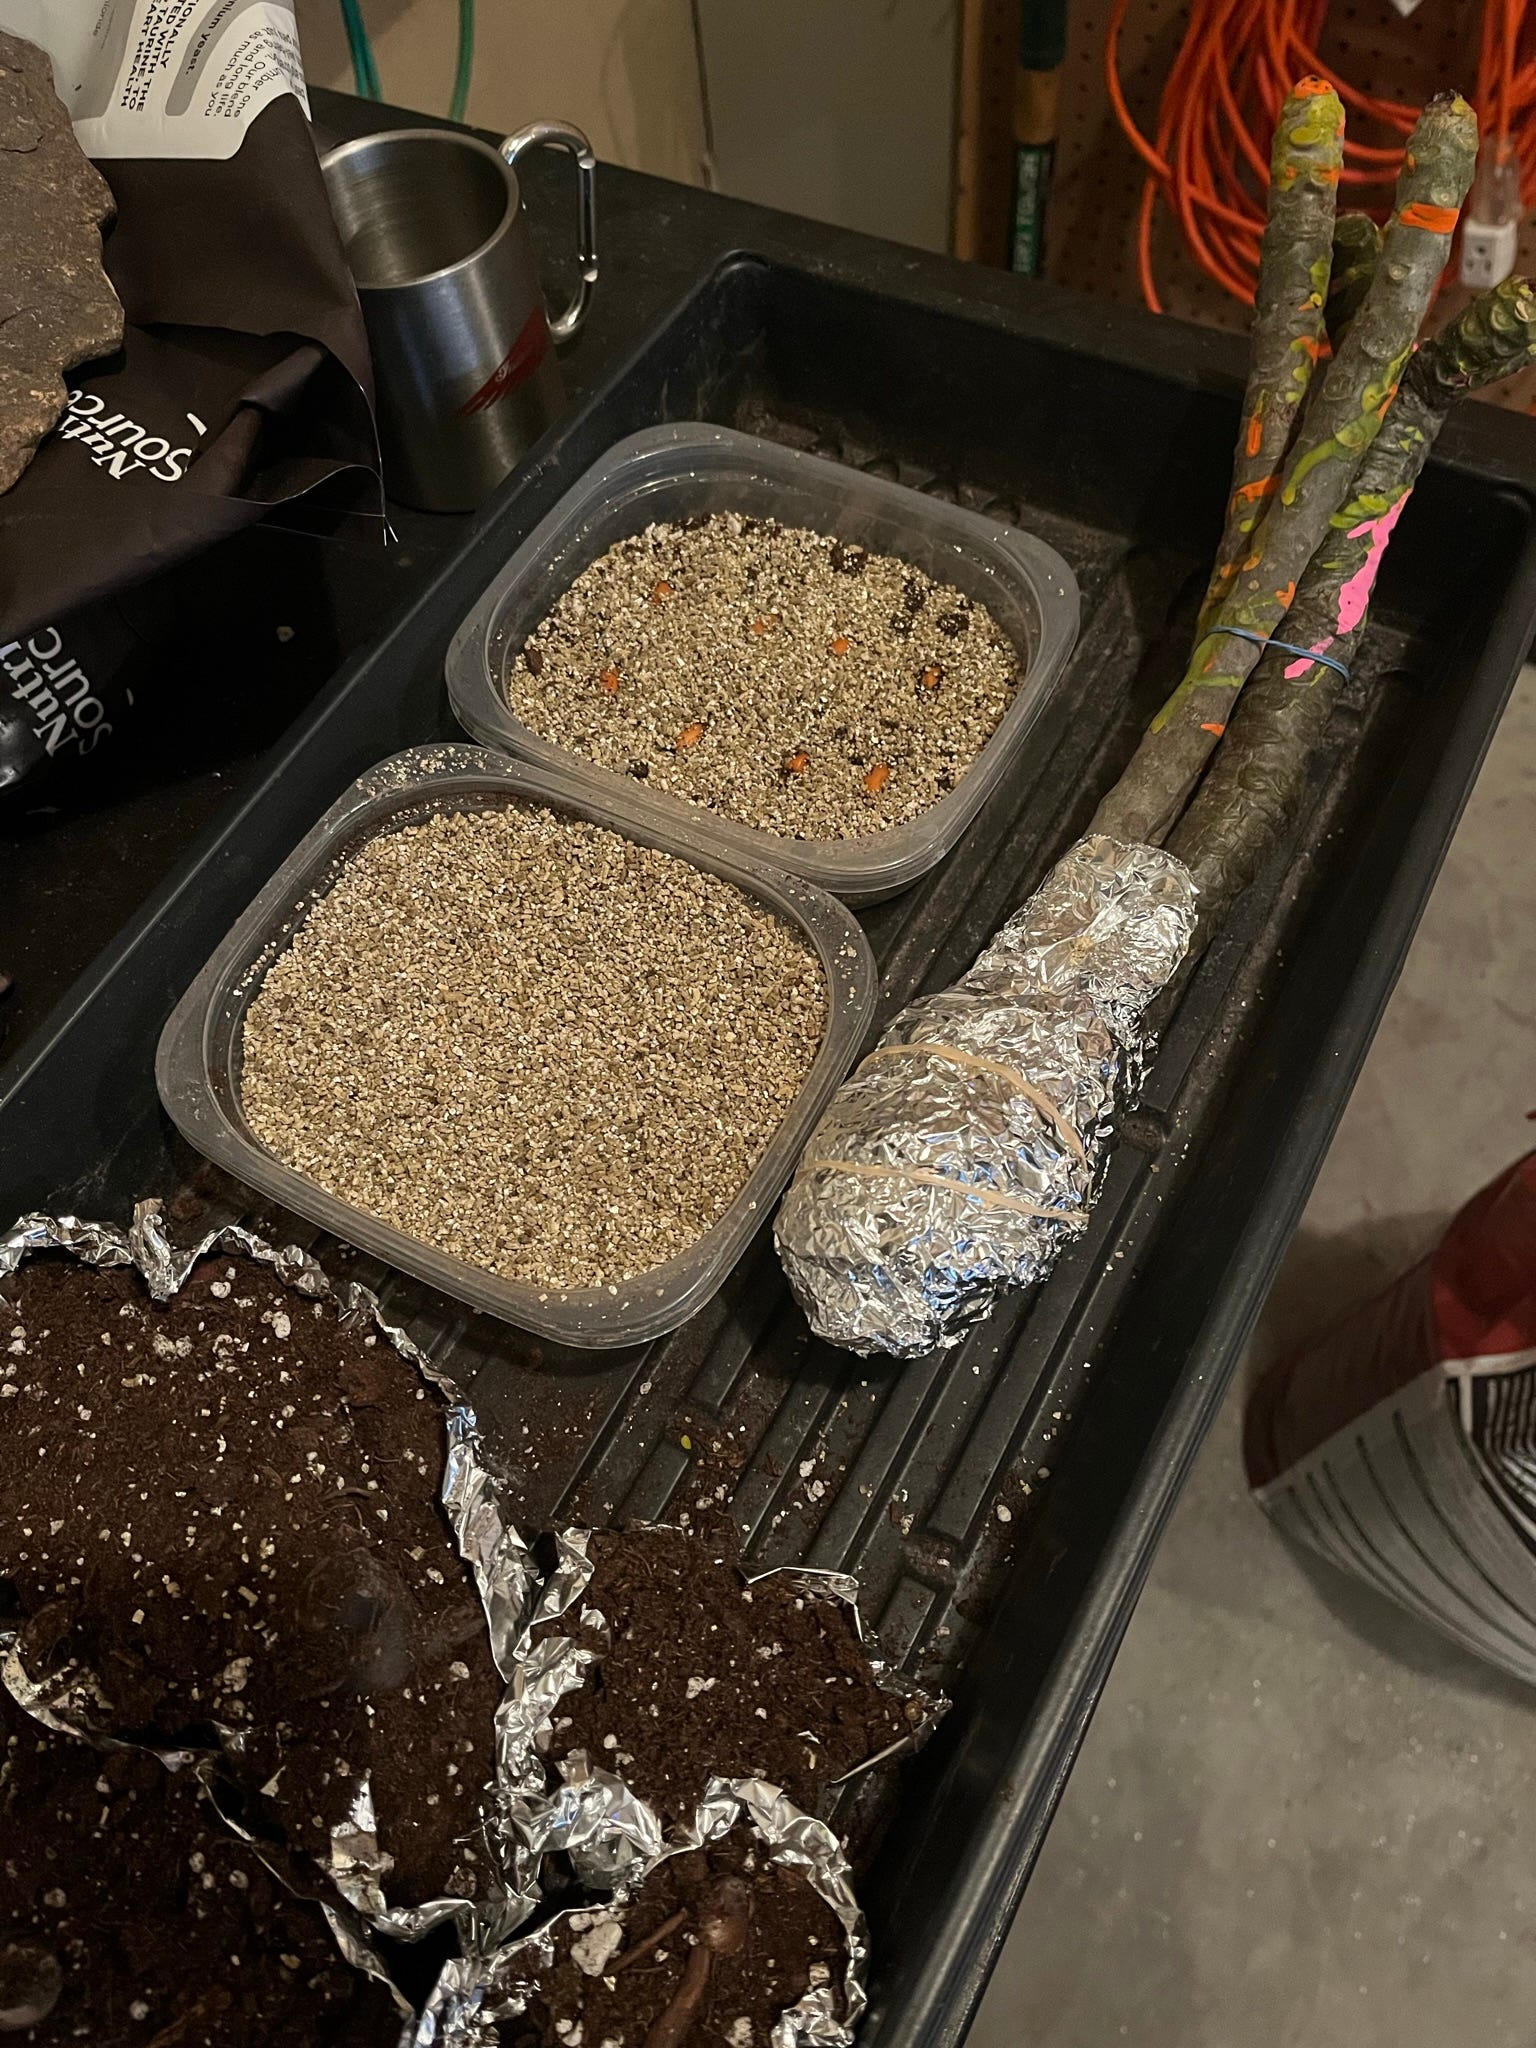
The last of my recent odd projects consisted of rooting plumeria cuttings that I recently bought at a farmers market in Florida. Plumeria make great outside container plants during the summer, and can be brought inside during the winter where they loose there leaves and enter dormancy. Having successfully rooted a plumeria cutting from Hawaii in 2019, I was tempted to try a more “local” source that was offering plumerias of different flower colors. Plumeria cuttings are one of the few types of cuttings that require the rooting environment to be almost moisture free: provide too much moisture and the cuttings quickly rot. To root these cuttings I took a piece of aluminum foil, wrapped it around three separate cuttings, and poured in a small amount of vermiculite to fill the newly created pouch. I then added a teaspoon of water to the vermiculite, and sealed it all with a rubber band. Finally, I placed these cuttings next to the cannas under the grow lights, where they will likely remain until May. At that time they will hopefully have roots and be ready for potting to continue their growth in the summer warmth.